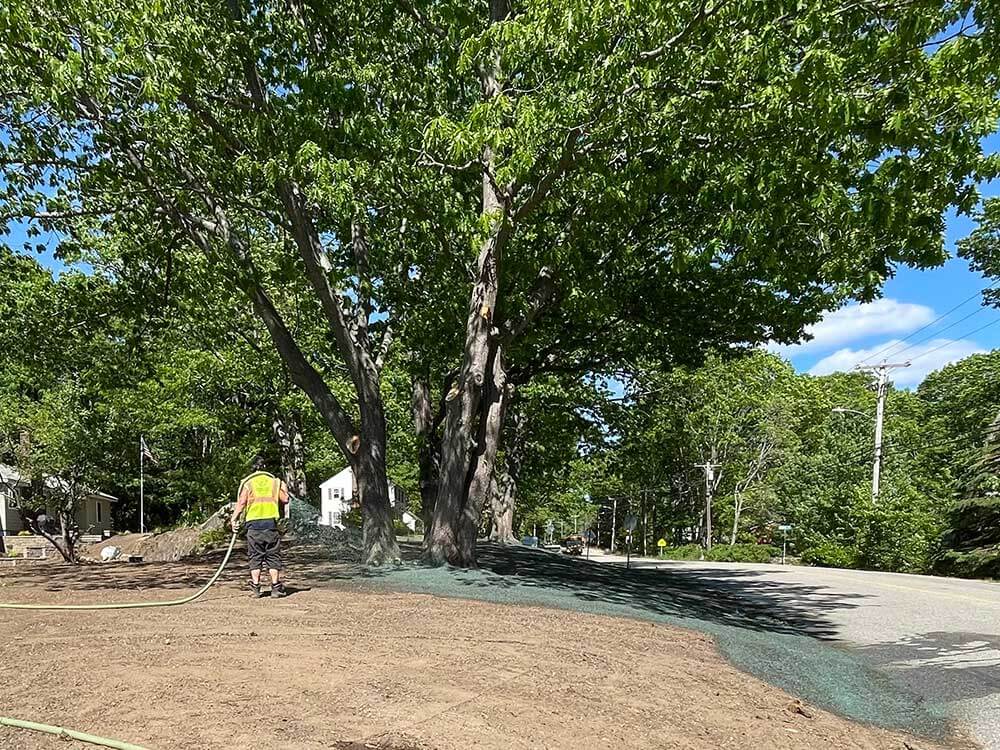
Are you looking to add some life to your Maine lawn this year, but don't want to spend the time or money on sod? Hydroseeding may be the perfect solution for you!
This guide will walk you through everything you need to know about hydroseeding your yard, from choosing the right seeds to proper watering and caring for your new lawn. So whether you're a seasoned pro or a complete beginner, read on for all the info you need to get started.
HYDROSEEDING: THE PROS & CONS
Hydroseeding is a popular method of planting grass seed. It involves mixing the seeds with water and a special fertilizing solution, then spraying the mixture onto the lawn.
The benefit of hydroseeding is that it’s a convenient and relatively inexpensive way to plant grass seed. In addition, hydroseeded lawns often establish themselves more quickly than those seeded using traditional methods.
However, there are some drawbacks to hydroseeding too. For example, the process can be messy and difficult to achieve even seed coverage. In addition, hydroseeded lawns may require more frequent watering than other types of yards.
As a result, it is essential to weigh the pros and cons of hydroseeding before deciding whether or not it is the right option for your property.
If you live in Southern Maine and need help hydroseeding your lawn, Prime Cut Landscaping is here to help! Get a free hydroseeding quote today.
5 STEPS TO DIY HYDROSEEDING
As an effective and inexpensive alternative to traditional seeding methods, hydroseeding can be used either on newly graded soil or existing lawns. Here’s how to DIY hydroseeding.
1. Test & choose your seed blend.
To start, ensure you test your soil. Without testing, you won’t know the unique needs of your lawn and, ultimately, of your grass.
One of the main benefits of hydroseeding is that you can select your seed blend. Unlike other seeding methods, you can purchase a more tailored grass blend made up of different species that benefit your conditions.
Blending different seed species allows you to create a lawn specifically tailored to your needs and requirements. As you can guess, it’s essential to test your soil before making your seed blend selection so that the hydroseed blend can be curated specifically for you.
2. Prepare the soil.
Once you've made the right seed blend choice, start preparing your soil. This can be done by tilling the soil to a depth of 6 inches or aerating the lawn.
For the best results, you’ll also want to apply a 2-inch blend of topsoil and compost. Topsoil provides essential nutrients that grass needs to grow strong, while compost helps to improve drainage and aeration. This simple step will give your lawn the foundation it needs to thrive for years to come.
3. Mix the hydroseeding solution.
Next, mix the hydroseeding solution. This can be purchased from a garden center or online, or you can purchase a premixed solution. (Luckily, you already know the seed blend that’s right for your soil type, since you did your testing!)
The hydroseeding mixture should be applied using a pump or hose-end sprayer. You can either rent or purchase these tools.
4. Keep the lawn watered.
Once the hydroseeding solution has been applied, it’s essential to keep the area moist by watering twice daily. Within 7 to 14 days, the grass seed will germinate and new growth will appear.
5. Fertilize and mow.
For the best results, you’ll want to fertilize the lawn after 4 to 6 weeks of growth. Additionally, depending on the rate of growth, your yard may be ready for the first mow in as little as 3 to 4 weeks.
MAINTAINING YOUR HYDROSEEDED LAWN
It’s important to take some special care of your lawn during the first few months after hydroseeding. As we mentioned in step #4 above, you’ll need to make sure that the lawn stays moist. This means watering regularly, as well as avoiding any foot traffic on the lawn. Kids and pets should stay off the grass until it’s had a chance to take root and establish itself.
To keep your hydroseeded lawn looking its best, it’s also essential to fertilize it regularly. We recommend applying fertilizer after six weeks and then every six weeks thereafter.
Be sure to use a nitrogen-rich fertilizer, as nitrogen is essential for healthy plant growth. Your hydroseeded lawn will remain green and vibrant for many years with proper care and feeding.
WHEN WILL YOU SEE RESULTS AFTER HYDROSEEDING?
When using hydroseeding for your lawn, you may be wondering how soon you can expect to see results. In general, you can begin to see your seeds sprouting in as little as a week. However, it can take up to ten days or longer to germinate, depending on the grass species.
Again, you can expect to be able to mow your lawn within four weeks of a hydroseeding session. Of course, the exact timeline will depend on several factors, including the type of grass seed used and the weather conditions during and after the application. However, with proper care and attention, you can enjoy a thick, green lawn in no time.
If you’re feeling ambitious this summer and want to take on a DIY project, hydroseeding your yard is one option worth considering. It can be a little daunting if you’ve never done it before, but the process can go smoothly with a few simple tips from above.
If DIY hydroseeding is too daunting for you, never fear. Prime Cut is here! Get a free hydroseeding quote today.


